
在鸿蒙上生成二维码的方法!
在实际应用开发中,时不时的会遇到 AI 领域相关的一些技术,本节主要详细讲述一下生成二维码技术,二维码可能涉及在各领域中,如:社交或通讯类应用、购物或支付类应用等。

所以对于 HarmonyOS 开发者而言,也需要了解和掌握 HarmonyOS AI 领域相关技术,这对于每一个 HarmonyOS 开发者,也是一项必不可少的专业技能。
功能介绍
生成二维码主要根据开发者给定的字符串信息和二维码图片尺寸,返回相应的二维码图片字节流。调用方可以通过二维码字节流生成二维码图片。
开发指南
①创建二维码
????IBarcodeDetector?barcodeDetector??
=VisionManager.getBarcodeDetector(QRCodeAbilitySlice.this);
?????final?int?SAMPLE_LENGTH?=?500;
????byte[]?byteArray?=?new?byte[SAMPLE_LENGTH?*?SAMPLE_LENGTH?*?4];
barcodeDetector.detect(barText,byteArray,SAMPLE_LENGTH,SAMPLE_LENGTH);
????barcodeDetector.release();
????ImageSource.SourceOptions?srcOpts?=?new?ImageSource.SourceOptions();
????srcOpts.formatHint?=?"image/png";
??????ImageSource?imgSource=?ImageSource.create(byteArray,srcOpts);
????ImageSource.DecodingOptions?decodingOpts?=new?
ImageSource.DecodingOptions?();?
decodingOpts.desiredPixelFormat=?PixelFormat.ARGB_8888;
?????PixelMap?pMap?=imgSource.createPixelmap(decodingOpts);
?????imgQrCode.setPixelMap(pMap);
?????barcodeDetector.release?();
imgSource.release?();
??if?(pMap!?=null)
????{
????????pMap.release?();
????}
?????VisionManager.destroy?();
②定义 ConnectionCallback 回调,实现连接能力引擎成功与否后的操作
ConnectionCallback?connectionCallback?=?new?ConnectionCallback?()?{
????@Override
????public?void?onServiceConnect?()?{
??????String?barText=?"";
???????createQRCode(barText);
????}
????@Override
????public?void?onServiceDisconnect?()?{
????????//?Do?something?when?service?connects?unsuccessfully
????}
};
③调用 VisionManager.init() 方法,将此工程的 context 和 connectionCallback?作为入参,建立与能力引擎的连接
int?result?=?VisionManager.init(context,?connectionCallback);
示例代码
xml 布局:
<?xml?version="1.0"?encoding="utf-8"?>
<DirectionalLayout
xmlns:ohos="http://schemas.huawei.com/res/ohos"
ohos:height="match_parent"
ohos:width="match_parent"
ohos:orientation="vertical">

<Image
??ohos:id="$+id:imgQrCode"
??ohos:height="500vp"
??ohos:width="500vp"
??ohos:layout_alignment="center"/>

</DirectionalLayout>
案例代码:
MainAbilitySlice.java
package?com.isoftstone.qrcode.slice;

import?com.isoftstone.qrcode.ResourceTable;
import?ohos.aafwk.ability.AbilitySlice;
import?ohos.aafwk.content.Intent;
import?ohos.agp.components.Text;

public?class?MainAbilitySlice?extends?AbilitySlice?{

??@Override
??public?void?onStart(Intent?intent)?{
????super.onStart(intent);
????super.setUIContent(ResourceTable.Layout_ability_main);
????Text?qrCode?=?(Text)?findComponentById(ResourceTable.Id_qrCode_text);
????qrCode.setClickedListener(component?->?present(new?QRCodeAbilitySlice(),new?Intent()));
??}

??@Override
??public?void?onActive()?{
????super.onActive();
??}

??@Override
??public?void?onForeground(Intent?intent)?{
????super.onForeground(intent);
??}
}
QRCodeAbilitySlice.java

package?com.isoftstone.qrcode.slice;

import?com.isoftstone.qrcode.ResourceTable;
import?ohos.aafwk.ability.AbilitySlice;
import?ohos.aafwk.content.Intent;
import?ohos.agp.components.Image;
import?ohos.ai.cv.common.ConnectionCallback;
import?ohos.ai.cv.common.VisionManager;
import?ohos.ai.cv.qrcode.IBarcodeDetector;
import?ohos.media.image.ImageSource;
import?ohos.media.image.PixelMap;
import?ohos.media.image.common.PixelFormat;

/**
?*?二维码生成
?*/
public?class?QRCodeAbilitySlice?extends?AbilitySlice?{

????private?Image?imgQrCode;
????@Override
????public?void?onStart(Intent?intent)?{
????????super.onStart(intent);
????????super.setUIContent(ResourceTable.Layout_ability_qrcode);
????????imgQrCode=(Image)findComponentById(ResourceTable.Id_imgQrCode);
????}

????@Override
????public?void?onActive()?{
????????super.onActive();
????????ConnectionCallback?connectionCallback?=?new?ConnectionCallback()?{
????????????@Override
????????????public?void?onServiceConnect()?{
????????????????//需要生成二维码的字符串
????????????????String?barText=?"www.baidu.com";
????????????????//连接成功生成二维码
????????????????createQRCode(barText);
????????????}

????????????@Override
????????????public?void?onServiceDisconnect()?{
????????????????//?Do?something?when?service?connects?unsuccessfully
????????????}
????????};
????????//初始化,建立与能力引擎的连接
????????VisionManager.init(this,?connectionCallback);
????}

????@Override
????public?void?onForeground(Intent?intent)?{
????????super.onForeground(intent);
????}

????/**
?????*?创建二维码
?????*?@param?barText?需要生成二维码的字符串
?????*/
????private?void?createQRCode(String?barText){
????????//实例化接口,获取二维码侦测器
????????IBarcodeDetector?barcodeDetector?=?VisionManager.getBarcodeDetector(QRCodeAbilitySlice.this);
????????//定义码生成图像的尺寸
????????final?int?SAMPLE_LENGTH?=?500;
????????//根据图像的大小,分配字节流数组的空间
????????byte[]?byteArray?=?new?byte[SAMPLE_LENGTH?*?SAMPLE_LENGTH?*?4];
????????//调用IBarcodeDetector的detect()方法,根据输入的字符串信息生成相应的二维码图片字节流
????????barcodeDetector.detect(barText,?byteArray,?SAMPLE_LENGTH,?SAMPLE_LENGTH);
????????//释放侦测器
????????barcodeDetector.release();
????????//通过SourceOptions指定数据源的格式信息
????????ImageSource.SourceOptions?srcOpts?=?new?ImageSource.SourceOptions();
????????//定义图片格式
????????srcOpts.formatHint?=?"image/png";
????????//创建图片源
????????ImageSource?imgSource=?ImageSource.create(byteArray,srcOpts);
????????//创建图像解码选项
????????ImageSource.DecodingOptions?decodingOpts?=new?ImageSource.DecodingOptions();
????????decodingOpts.desiredPixelFormat=?PixelFormat.ARGB_8888;
????????//通过图片源创建PixelMap
????????PixelMap?pMap?=imgSource.createPixelmap(decodingOpts);
????????//赋值到图片标签
????????imgQrCode.setPixelMap(pMap);
????????//释放资源
????????barcodeDetector.release();
????????imgSource.release();
????????if(pMap!=null)
????????{
????????????pMap.release();
????????}
????????//断开与能力引擎的连接
????????VisionManager.destroy();
????}
}
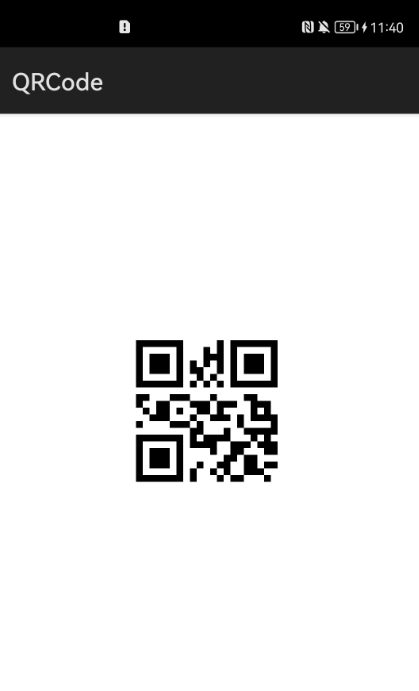
实现效果
如下图:
关注公众号:拾黑(shiheibook)了解更多
[广告]赞助链接:
四季很好,只要有你,文娱排行榜:https://www.yaopaiming.com/
让资讯触达的更精准有趣:https://www.0xu.cn/


 51CTO技术栈
 关注网络尖刀微信公众号
随时掌握互联网精彩
赞助链接


排名
热点
搜索指数
- 1 习近平将发表二〇二六年新年贺词 7904141
- 2 2026年国补政策来了 7808738
- 3 东部战区:开火!开火!全部命中! 7712893
- 4 2026年这些民生政策将惠及百姓 7616985
- 5 小学食堂米线过期2.5小时被罚5万 7519709
- 6 解放军喊话驱离台军 原声曝光 7428214
- 7 为博流量直播踩烈士陵墓?绝不姑息 7327605
- 8 每月最高800元!多地发放养老消费券 7238391
- 9 数字人民币升级 1月1日起将计付利息 7141831
- 10 2026年1月1日起 一批新规将施行 7040675