10 行代码玩转 NumPy!


导入模块
>>>?import?numpy?as?np
>>>?from?PIL?import?Image
>>>?from?matplotlib?import?cm?as?mplcm
基本绘画流程
>>>?im?=?np.random.randint(0,?255,?(100,300),?dtype=np.uint8)
>>>?im?=?Image.fromarray(im)
>>>?im.show()?#?或者im.save(r'd:\gray_300_100.jpg')保存为文件


生成随机彩色图像
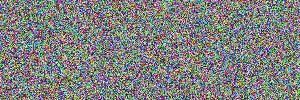
>>>?im?=?np.random.randint(0,?255,?(100,300,3),?dtype=np.uint8)
>>>?Image.fromarray(im,?mode='RGB').show()


生成渐变色图像
>>>?r?=?np.tile(np.linspace(192,255,?300,?dtype=np.uint8),?(600,1)).T
>>>?g?=?np.tile(np.linspace(192,255,?600,?dtype=np.uint8),?(300,1))
>>>?b?=?np.ones((300,600),?dtype=np.uint8)*224
>>>?im?=?np.dstack((r,g,b))
>>>?Image.fromarray(im,?mode='RGB').show()


在渐变色背景上画曲线
>>>?r?=?np.tile(np.linspace(192,255,?300,?dtype=np.uint8),?(600,1)).T
>>>?g?=?np.tile(np.linspace(192,255,?600,?dtype=np.uint8),?(300,1))
>>>?b?=?np.ones((300,600),?dtype=np.uint8)*224
>>>?im?=?np.dstack((r,g,b))
>>>?x?=?np.arange(600)
>>>?y?=?np.sin(np.linspace(0,?2*np.pi,?600))
>>>?y?=?np.int32((y+1)*0.9*300/2?+?0.05*300)
>>>?for?i?in?range(0,?150,?6):
????im[y[:-i],(x+i)[:-i]]?=?np.array([255,0,255])

>>>?Image.fromarray(im,?mode='RGB').show()


使用颜色映射(ColorMap)


>>>?cm1?=?mplcm.get_cmap('jet')?#?jet是专属定制类的ColorMap
>>>?cm1.N?#?jet有256种颜色
256
>>>?cm1(0)?#?返回序号为0的颜色
(0.0,?0.0,?0.5,?1.0)
>>>?cm1(128)?#?返回序号为128的颜色
(0.4901960784313725,?1.0,?0.4775458570524984,?1.0)
>>>?cm1(255)?#?返回序号为255的颜色
(0.5,?0.0,?0.0,?1.0)
>>>?cm2?=?mplcm.get_cmap('Paired')?#?Paired是分段阶梯类的ColorMap
>>>?cm2.N?#?Paired有12种颜色
12
>>>?cm2(0)?#?返回序号为0的颜色
(0.6509803921568628,?0.807843137254902,?0.8901960784313725,?1.0)
>>>?cm2(11)?#?返回序号为11的颜色
(0.6941176470588235,?0.34901960784313724,?0.1568627450980392,?1.0)
展示NumPy的魅力
>>>?w,?h?=?9,?7
>>>?i?=?np.repeat(np.arange(h),?w).reshape(h,?w)
>>>?j?=?np.tile(np.arange(w),?(h,1))
>>>?i
array([[0,?0,?0,?0,?0,?0,?0,?0,?0],
???????[1,?1,?1,?1,?1,?1,?1,?1,?1],
???????[2,?2,?2,?2,?2,?2,?2,?2,?2],
???????[3,?3,?3,?3,?3,?3,?3,?3,?3],
???????[4,?4,?4,?4,?4,?4,?4,?4,?4],
???????[5,?5,?5,?5,?5,?5,?5,?5,?5],
???????[6,?6,?6,?6,?6,?6,?6,?6,?6]])
>>>?j
array([[0,?1,?2,?3,?4,?5,?6,?7,?8],
???????[0,?1,?2,?3,?4,?5,?6,?7,?8],
???????[0,?1,?2,?3,?4,?5,?6,?7,?8],
???????[0,?1,?2,?3,?4,?5,?6,?7,?8],
???????[0,?1,?2,?3,?4,?5,?6,?7,?8],
???????[0,?1,?2,?3,?4,?5,?6,?7,?8],
???????[0,?1,?2,?3,?4,?5,?6,?7,?8]])
>>>?i?=?i?-?h//2
>>>?j?=?j?-?w//2
>>>?i
array([[-3,?-3,?-3,?-3,?-3,?-3,?-3,?-3,?-3],
???????[-2,?-2,?-2,?-2,?-2,?-2,?-2,?-2,?-2],
???????[-1,?-1,?-1,?-1,?-1,?-1,?-1,?-1,?-1],
???????[?0,??0,??0,??0,??0,??0,??0,??0,??0],
???????[?1,??1,??1,??1,??1,??1,??1,??1,??1],
???????[?2,??2,??2,??2,??2,??2,??2,??2,??2],
???????[?3,??3,??3,??3,??3,??3,??3,??3,??3]])
>>>?j
array([[-4,?-3,?-2,?-1,??0,??1,??2,??3,??4],
???????[-4,?-3,?-2,?-1,??0,??1,??2,??3,??4],
???????[-4,?-3,?-2,?-1,??0,??1,??2,??3,??4],
???????[-4,?-3,?-2,?-1,??0,??1,??2,??3,??4],
???????[-4,?-3,?-2,?-1,??0,??1,??2,??3,??4],
???????[-4,?-3,?-2,?-1,??0,??1,??2,??3,??4],
???????[-4,?-3,?-2,?-1,??0,??1,??2,??3,??4]])
自然,也很容易计算出每个像素距离图像中心的距离数组(以d表示)。下面的代码使用np.hypot()函数完成距离计算,如果先求平方和再开平方,也没有问题,只是不够酷而已。
>>>?d?=?np.hypot(i,?j)
>>>?d
array([[5.????????,?4.24264069,?3.60555128,?3.16227766,?3.????????,
????????3.16227766,?3.60555128,?4.24264069,?5.????????],
???????[4.47213595,?3.60555128,?2.82842712,?2.23606798,?2.????????,
????????2.23606798,?2.82842712,?3.60555128,?4.47213595],
???????[4.12310563,?3.16227766,?2.23606798,?1.41421356,?1.????????,
????????1.41421356,?2.23606798,?3.16227766,?4.12310563],
???????[4.????????,?3.????????,?2.????????,?1.????????,?0.????????,
????????1.????????,?2.????????,?3.????????,?4.????????],
???????[4.12310563,?3.16227766,?2.23606798,?1.41421356,?1.????????,
????????1.41421356,?2.23606798,?3.16227766,?4.12310563],
???????[4.47213595,?3.60555128,?2.82842712,?2.23606798,?2.????????,
????????2.23606798,?2.82842712,?3.60555128,?4.47213595],
???????[5.????????,?4.24264069,?3.60555128,?3.16227766,?3.????????,
????????3.16227766,?3.60555128,?4.24264069,?5.???????]])
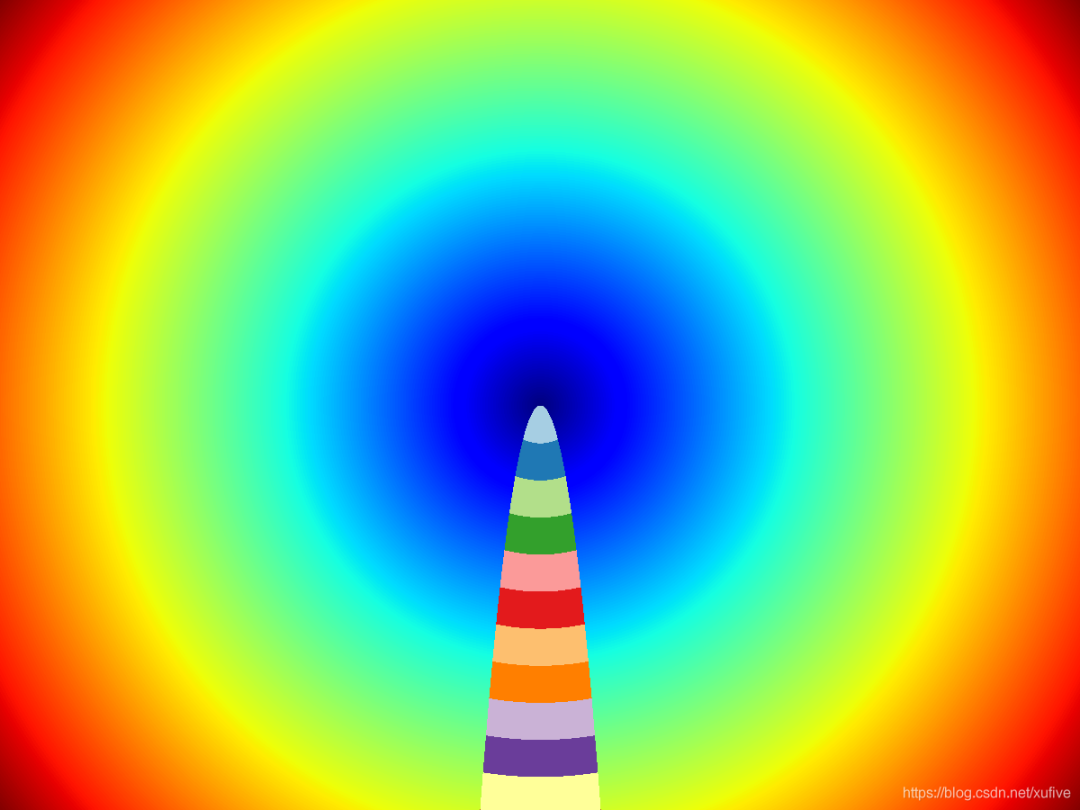
>>>?def?draw_picture(w,?h,?cm1='jet',?cm2='Paired'):
????cm1,?cm2?=?mplcm.get_cmap(cm1),?mplcm.get_cmap(cm2)
????colormap1,?colormap2?=?np.array([cm1(k)?for?k?in?range(cm1.N)]),?np.array([cm2(k)?for?k?in?range(cm2.N)])
????i,?j?=?np.repeat(np.arange(h),w).reshape(h,w)-h//2,?np.tile(np.arange(w),?(h,1))-w//2
????d?=?np.hypot(i,?j)
????e?=?d[(j*j/10)<i]
????d?=?np.int32((cm1.N-1)*(d-d.min())/(d.max()-d.min()))
????d?=?np.uint8(255*colormap1[d])
????e?=?np.int32((cm2.N-1)*(e-e.min())/(e.max()-e.min()))
????d[(j*j/10)<i]?=?np.uint8(255*colormap2[e])
????Image.fromarray(d).show()


>>>?draw_picture(1200,?900,?cm1='jet',?cm2='Paired')


更多精彩推荐 Arm收购进展、元宇宙、GPU涨价……听听黄仁勋怎么说 深度学习教你重建赵丽颖的三维人脸 程序员提前下班的福音来了!GitHub、OpenAI 联手推出 AI 代码生成神器 点分享 点收藏 点点赞 点在看
关注公众号:拾黑(shiheibook)了解更多
[广告]赞助链接:
四季很好,只要有你,文娱排行榜:https://www.yaopaiming.com/
让资讯触达的更精准有趣:https://www.0xu.cn/
 关注网络尖刀微信公众号
随时掌握互联网精彩
赞助链接
排名
热点
搜索指数
- 1 中共中央召开党外人士座谈会 7904075
- 2 日本附近海域发生7.5级地震 7808816
- 3 日本发布警报:预计将出现最高3米海啸 7714622
- 4 全国首艘氢电拖轮作业亮点多 7616654
- 5 课本上明太祖画像换了 7521766
- 6 中国游客遇日本地震:连滚带爬躲厕所 7424490
- 7 亚洲最大“清道夫”落户中国洋浦港 7330256
- 8 日本地震当地居民拍下自家书柜倒塌 7238891
- 9 熊猫宝宝聚餐横七竖八躺成一片 7141500
- 10 “人造太阳”何以照进现实 7040370


 AI100
AI100


